GoDaddy is one of the most famous domain providers in the world. They always offer really helpful coupon codes which help to buy domain from only 81 or 99 cents. Besides a good first meet up, GoDaddy has a very nice support team and easy to use control panel.

For you, all the beginners, I believe that starting a website with Blogspot is much easier than do it on your own. But, instead of using the free domain name (like yourblog.blogspot.com), a custom domain (yourblog.com) sounds more professional.
In this post, I will show you 3 simple steps to map your GoDaddy domain to work with Blogger
- Edit Blogger Address
- Set Your CNAME and A Records
- Connect your domain to Blogspot
I. Edit Blogger Address
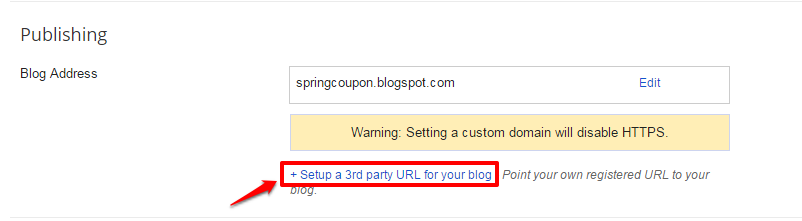
Go to Your Blogger Account, on the Basic Setting section, click + Setup a 3rd party URL for your blog to edit Blogger Address
Fill in you custom domain name address in the + Setup a 3rd party URL for your blog box.
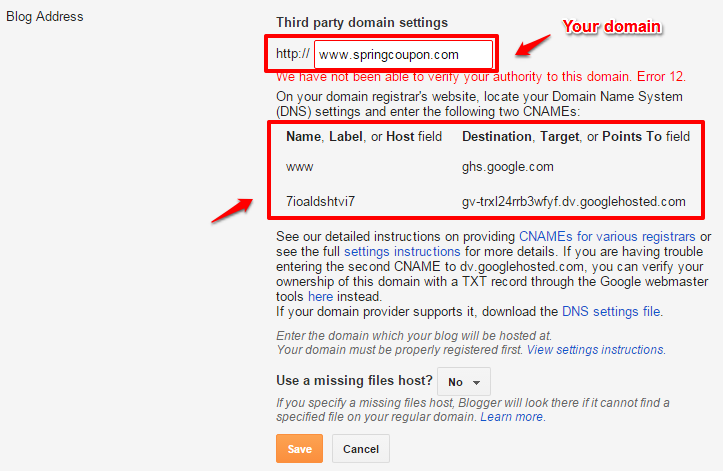
Click Save, you’ll see the note that guides you what should be set on your domain registrar’s website. Name, Label, or Host field and Destination, Target, or Points To field are important details, you need them to set up in the next step.
Open a new tab and come to the 2nd step with me!
II. Set Your CNAME and A Records
– Access to http://godaddy.com and log into your account.
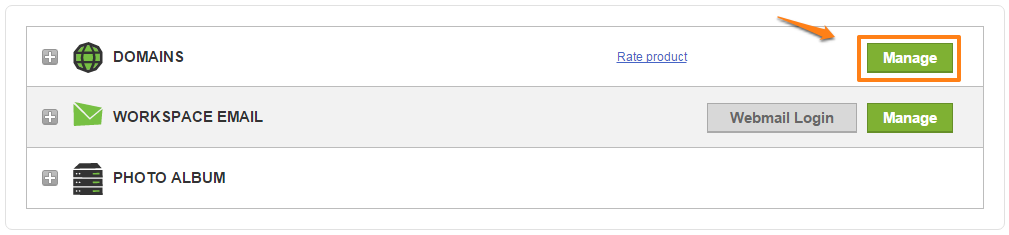
– In My Account page, press Manage next to DOMAINS.
– Choose the domain you want to work with your Blogger.
In Domain Details let check out your domain Nameservers.
- If your domain is located in GoDaddy’s default Nameserver, click to DNS ZONE FILE to continue setting.
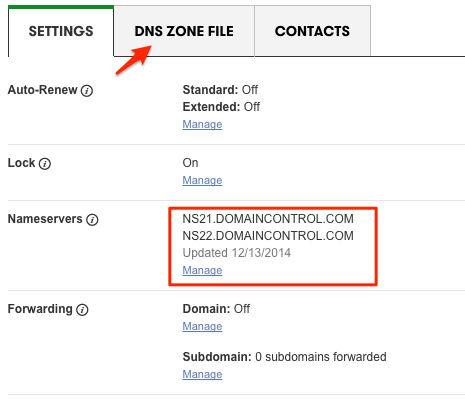
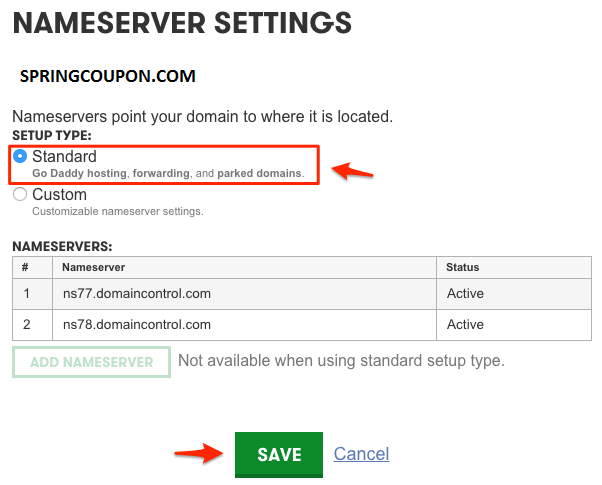
- Otherwise, if your domain is located on other Nameservers, change it to GoDaddy’s default Nameserver by clicking Manage, tick on Standard and Save.
– In DNS ZONE FILE, edit 2 parts
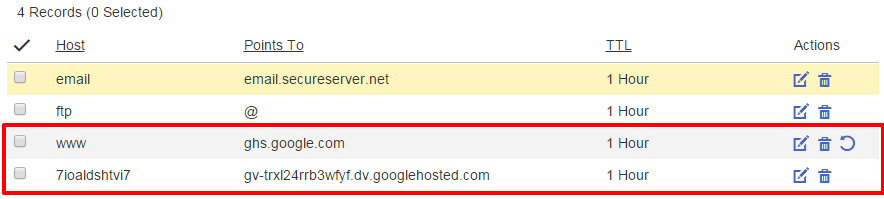
1. Edit CNAME www point to ghs.google.com and Add Record 7ioaldshtvi7 points to gv-trxl24rrb3wfyf.dv.googlehosted.com.
After Finish, the result will be seen as below
2. Delete current A records, then add 4 @ records with IPs
- 216.239.32.21
- 216.239.34.21
- 216.239.36.21
- 216.239.38.21
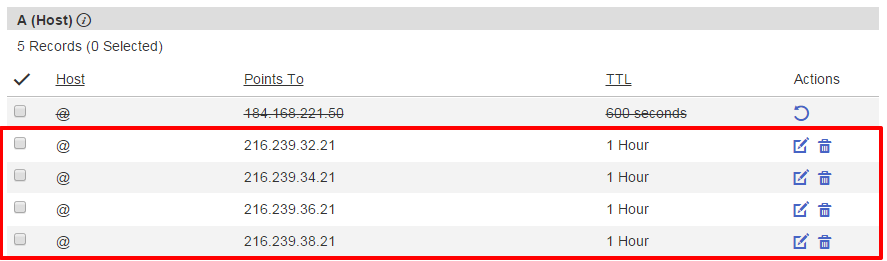
Those @ records will help domain automatically redirect from non-www to www.
Press Save changes.
DONE for the 2nd step!
III. Connect your domain to Blogspot
It will take about few minutes to update the records. After that, come back to the Blogger tab before, press Save again.
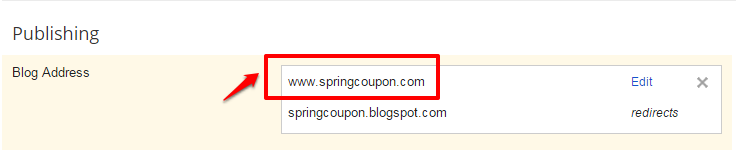
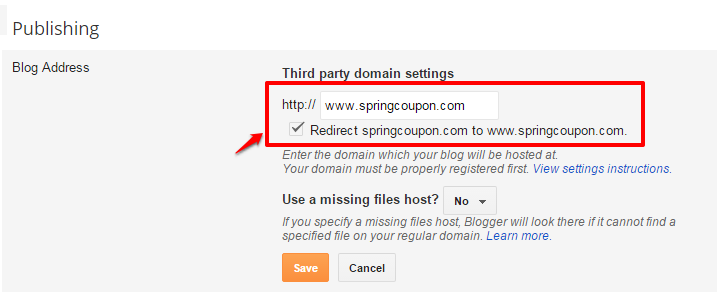
To auto redirect non-www domain to www domain, click Edit on the right side. Tick Redirect springcoupon.com to www.springcoupon.com.
Are you DONE! That’s all, we made it in very easy way, right?
Hope you successful!
what happens with the ip that you have scratched (184.168.221.50). It should be deleted too and only leave the 4 google IPs ??
gandi.net not working blogger
Thank you for sharing this guide, finally i was able to connect godaddy to blogger.
This is a nice coupons to get discount on godaddy.
how do you forward https to www non www on blogger?
I made it done successfully.
Check my first blog 🙂
Happy
.. Thank you.
I made it done successfully. Done in the right way as you said here in this update. Appreciate it.
Check my first blog 🙂
Happy
.. Thank you.
I need your support please pay dofollow backlink